
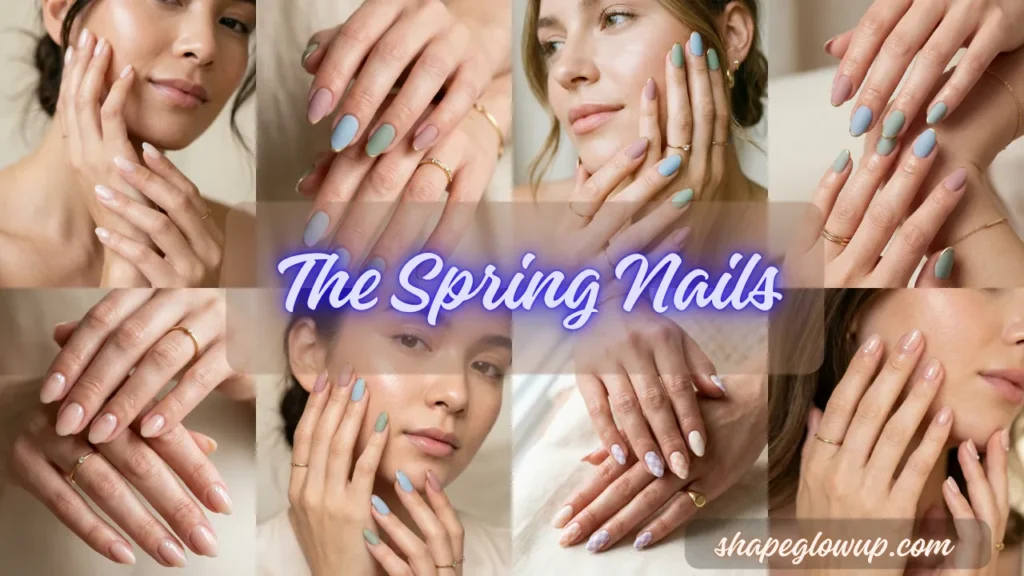
Your winter dark polishes are chipping, and your nails feel boring. But you’re not sure what spring design to ask for or try at home.
Sound familiar? Every spring, the same question pops up: what’s new, what’s cute, and what actually looks good on real nails? You want something fresh, but not childish. Trendy, but not impossible to DIY.
Here’s your answer: The Spring Nail Arts 7 Fresh Designs You Need to Try. From soft blends to tiny details, this guide covers everything you need to refresh your mani game.
In this article, you’ll learn how to master pastel gradient nails, the chic micro French tip, and playful daisy nail art plus four more designs that work on short, long, almond, or square nails. I’ll also share DIY tips, salon ask‑cards, and budget polish recommendations.
Ready to give your fingertips a spring glow up? Let’s dive in.
1. Pastel Gradient Nails Dreamy Sunset Fingertips
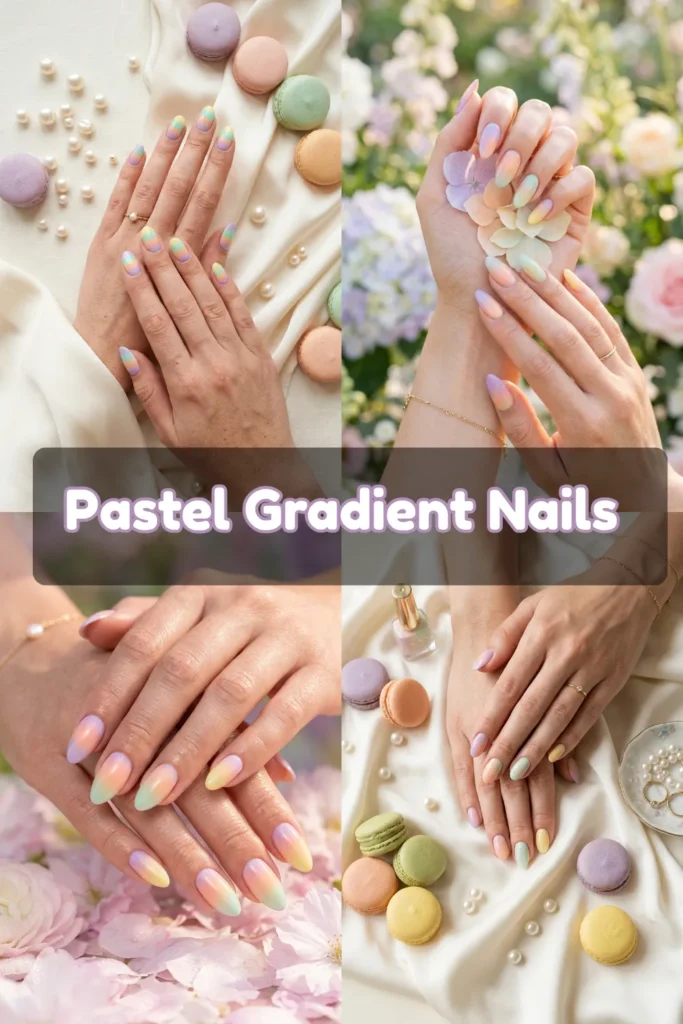
If you want a look that’s soft, romantic, and eye‑catching, start with pastel gradient nails. This design blends two or three pastel shades (like lavender + mint, or peach + yellow) into a seamless ombré effect.
How to get the look:
- Salon: Ask for a “sponge gradient” using pastel gel polishes.
- DIY: Use a makeup sponge. Paint stripes of each color on the sponge, then dab onto your nail. Repeat for opacity. Finish with a glossy top coat.
Best nail shapes: Almond or oval the rounded tip enhances the gradient flow.
Tip: For a subtle version, use a single pastel shade on the entire nail, then dab a slightly lighter shade only at the tips. It’s like a French ombré.
Pastel gradient nails are perfect for garden parties, spring break, or just brightening up a gloomy Monday.
2. Micro French Tip The Minimalist’s Dream
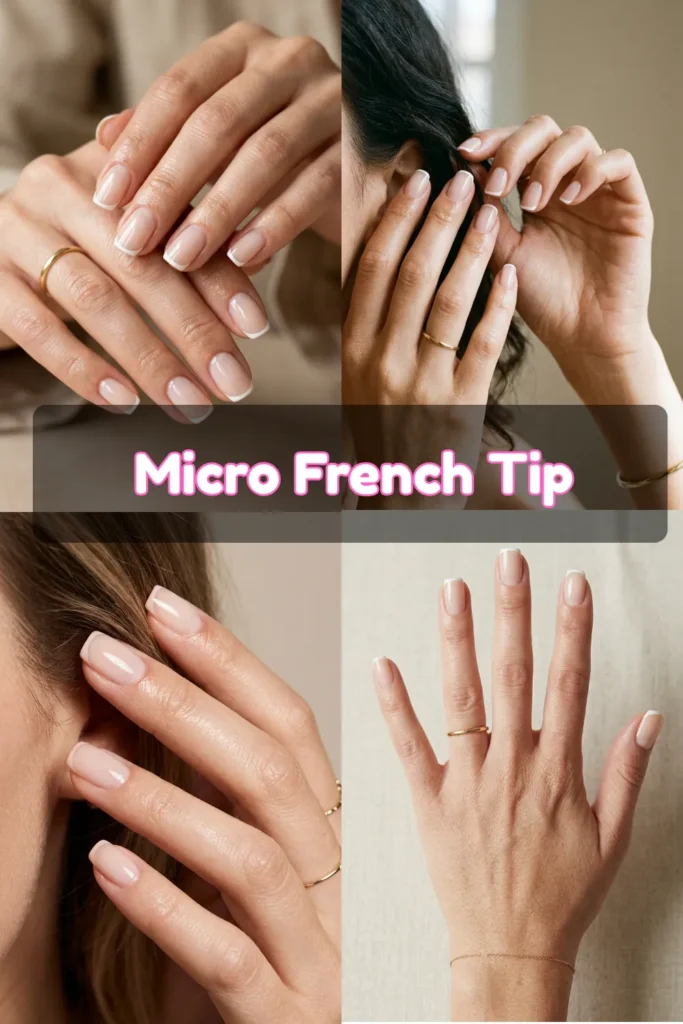
The classic French manicure got a 2026 update. Enter the micro French tip a whisper‑thin line of white (or pastel) at the very edge of your nail. It’s clean, modern, and infinitely more wearable than the thick, obvious tips of the past.
Why it’s trending: It lengthens short nail beds, looks expensive, and matches every outfit from denim to silk.
How to get it:
- Salon: Ask for “ultra‑thin French tips no more than 1mm thick.”
- DIY: Use a thin striping brush or a French tip sticker guide. Paint the tip, then gently widen the line if needed.
Best nail shapes: Squoval or round the blunt shape shows off the fine line beautifully.
Tip: For a spring twist, use a soft pastel color for the tip like butter yellow or baby blue instead of white.
Micro French tip is the quiet luxury of nail art. It whispers elegance.
3. Daisy Nail Art Playful & Whimsical
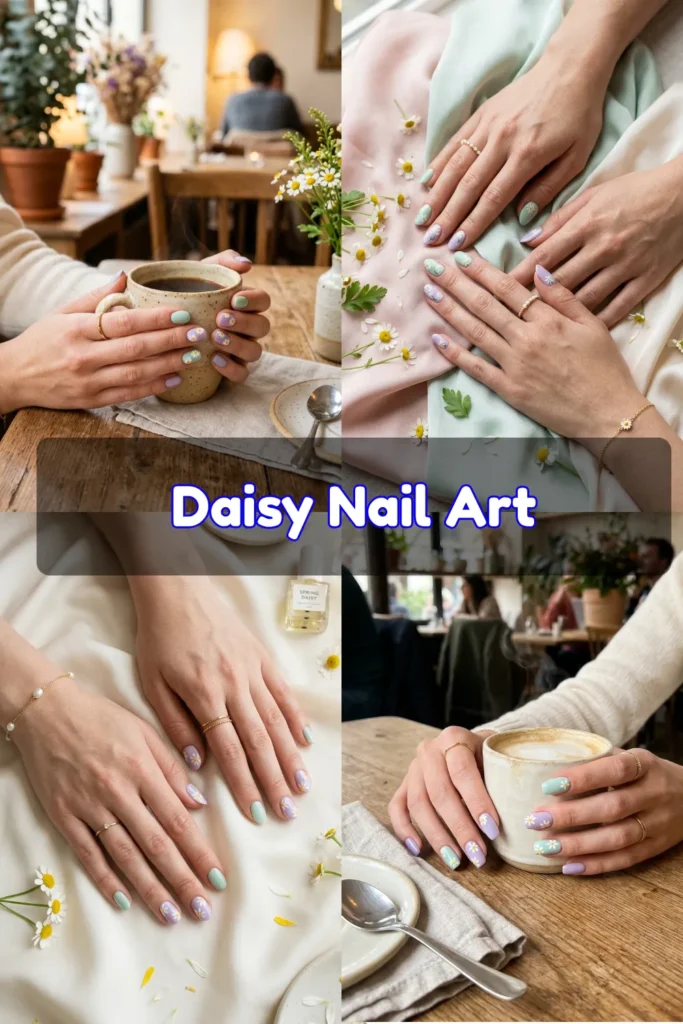
Nothing says spring like tiny flowers. Daisy nail art is everywhere this season single daisies on a bare or pastel base, scattered petals, or full‑blown floral accents.
How to style it:
- Minimalist: One daisy on each ring finger, rest in sheer pink.
- Maximalist: All nails with different daisy placements center, corner, scattered.
- Color combo: White petals with a yellow dot center on a mint or lavender base.
DIY method: Use a dotting tool. Make five white dots in a circle, then a yellow dot in the middle. Let dry before adding a top coat.
Tip: No dotting tool? Use the back of a bobby pin or a toothpick.
Daisy nail art is cheerful, feminine, and surprisingly easy to achieve even for beginners.
4. Glossy Bare + Pearl Accent
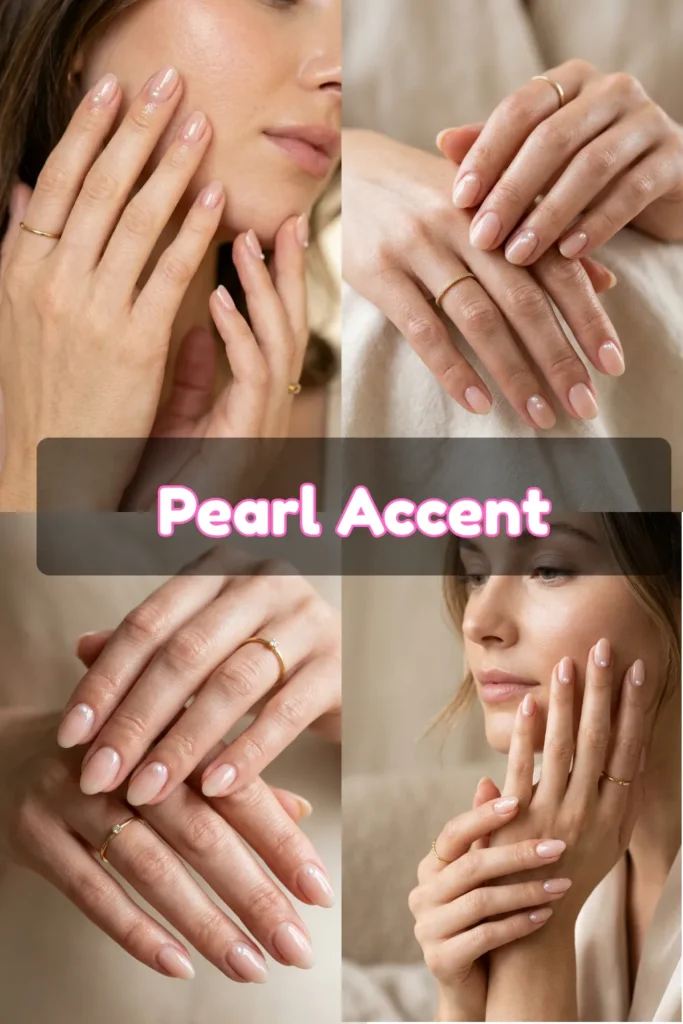
Not every spring design needs color. The glossy bare nail a translucent, barely‑there pink or beige with high shine gets an upgrade with a single pearl accent.
What to ask for: One or two small half‑pearls placed near the cuticle or at the tip of one or two nails. The rest stay perfectly bare and glossy.
Why it works: Pearls catch the light and add a 3D element without being bulky. It’s elegant, wedding‑appropriate, and still low‑maintenance.
Tip: Buy nail art pearl stickers online (under $5). Stick them on after your top coat, then seal with another thin layer of top coat.
This design works on any nail shape, but looks especially chic on short, natural nails.
5. Soft Checkered Pattern
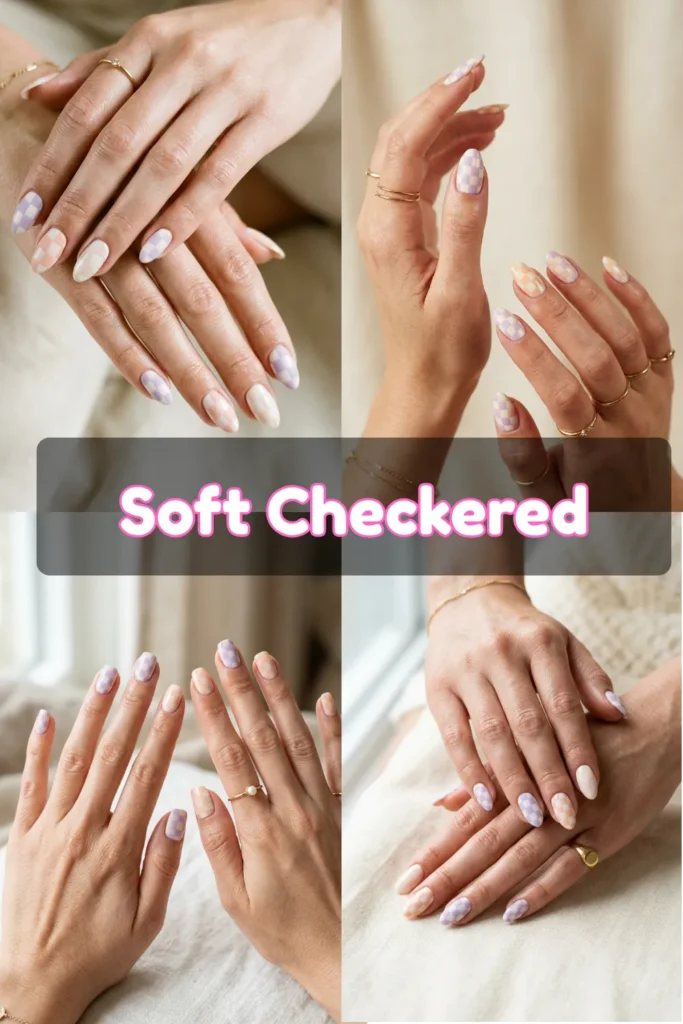
Checkered prints aren’t just for picnic blankets. A soft checkered pattern in pastels like lavender and white, or peach and cream feels fresh and modern on nails.
How to create it:
- Use a thin brush or nail art pen to draw vertical and horizontal lines.
- Keep the squares small (about 2mm each).
- Use a matte top coat for a fabric‑like finish, or glossy for more pop.
Best for: Almond or square nails the pattern needs a flat surface to read clearly.
Tip: Use gel polish for crisp lines; regular polish tends to bleed. If using regular polish, let each line dry completely before crossing with the perpendicular line.
This design is playful but not childish perfect for spring weekends.
6. Matte Pastel With Metallic Edge
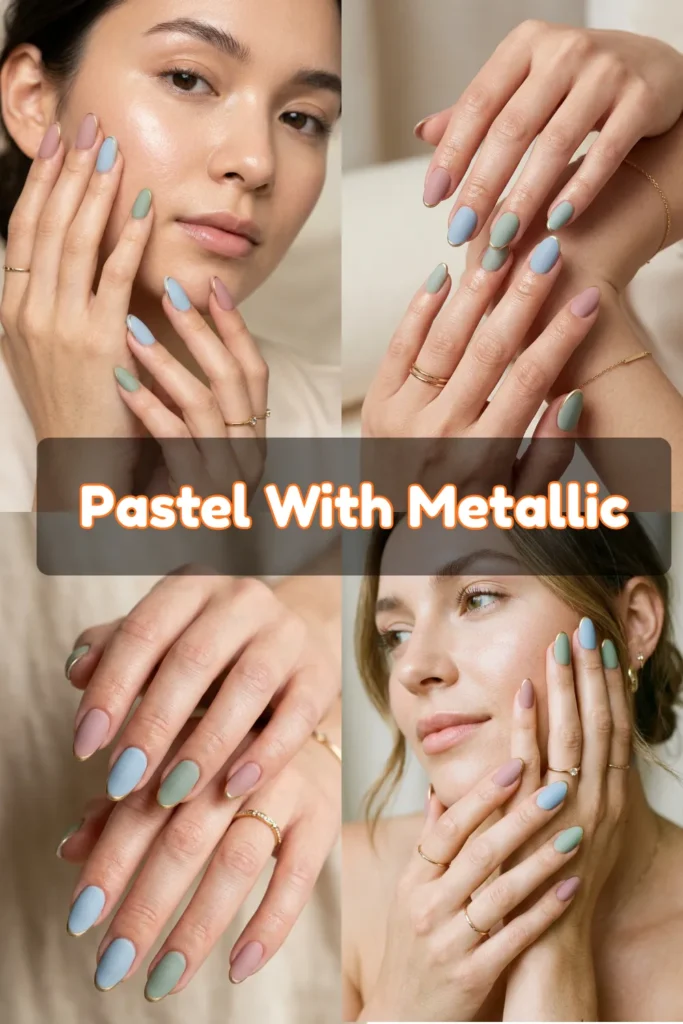
Matte nails are often associated with fall, but a matte pastel think dusty rose, powder blue, or sage green feels completely fresh for spring. Add a thin metallic edge in gold or silver at the tip or along the sidewall for contrast.
Why it’s special: The matte finish softens the color; the metallic edge adds a touch of luxury. It’s understated but interesting.
How to ask for it: “Matte pastel on all nails, with a thin gold line along the free edge.”
DIY tip: Paint your nails with matte top coat over pastel polish. Then use a metallic striping tape or a thin brush with gold polish for the edge.
Tip: If you don’t have metallic polish, use a gold or silver nail sticker cut into thin strips.
7. The Clean Girl “My Nails But Better”
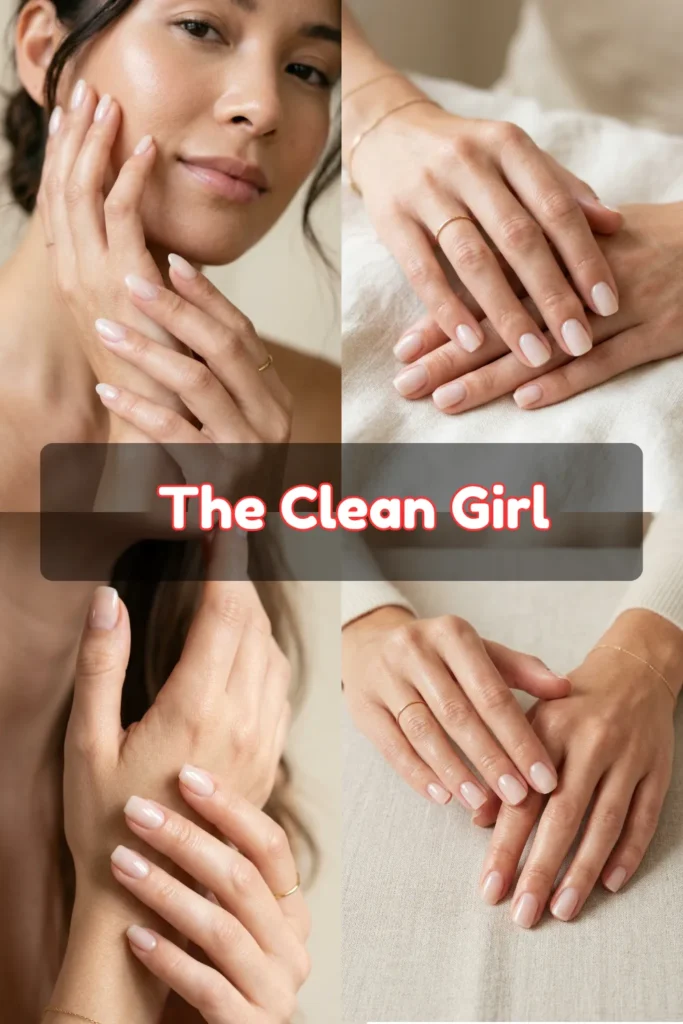
Finally, the ultimate low‑maintenance spring design: super glossy, perfectly shaped, completely bare just a milky, translucent finish. No art, no color, just glass‑level shine.
Why it’s a design: It requires precision perfect cuticles, even filing, and zero chips. It’s the nail equivalent of “I woke up like this.”
How to achieve it:
- File into your favorite shape (almond or squoval are best).
- Buff away ridges.
- Apply one coat of ridge filler, then two coats of glossy top coat. No color needed.
Tip: Use a cuticle oil every night and wear gloves while cleaning. The cleaner your natural nails, the better this look works.
This “bare” style is the ultimate proof that The Spring Nail Arts include minimalism as much as maximalism.
Your Spring Manicure Awaits
From pastel gradient nails to the subtle micro French tip and cheerful daisy nail art, you now have 7 fresh designs to choose from. Whether you’re a salon regular or a DIY enthusiast, there’s a look here for your budget, skill level, and lifestyle.
So book that appointment or pull out your polishes. Spring is short your nails should make the most of it.
Table of Contents
Which of these 7 spring nail designs are you most excited to try? The daisy nail art? The micro French tip? Or are you going for the glossy bare look? Drop a comment below and if you’ve already taken photos tag me on Pinterest . Let’s inspire each other to have the prettiest fingertips this season.
You might like – Flattering Is a Feeling, Full-Figure Women Who Love to Dress Up
Browse our Style Inspiration category for more looks, or send us a message at admin@shapeglowup.com we’d love to see how you glow.
Own your shape. Spark your power.
— Sapphire Harper
Shape Glow Up

